
Without going as far as sander repair, the first step is good maintenance.
Maintaining and repairing your sander is essential if you want to get the most out of it over time.
The sander is an essential tool for your worksites, but breakdowns can be a radical brake. Knowing how to diagnose and repair these problems can save you time and money. Here's a practical guide to identifying and resolving common sander faults.
By taking care to maintain and repair your drill, you're actively helping to protect the environment. Every time you repair your drill, you avoid producing several kg of waste and having to buy a new machine. Even so, don't buy a second-hand machine if you don't know its date of manufacture or if you think it's over 50 years old. We can help you make this diagnosis by sending you a photo by e-mail.
When your sander shows signs of breaking down, it's often more economical and practical to repair it yourself. Self-repairs are generally three times cheaper than calling in a professional, whether your machine is under guarantee or not. On the other hand, if you open your machine, your repairer will see it and the guarantee may be invalidated. So don't be overconfident, which could cost you a lot more than a visit to the manufacturer.
Regular maintenance will prolong the life of your tool. Periodic servicing is necessary, especially if the machine is used intermittently. Ideally, this should be done between jobs. Various parts such as the motor, power cord and carbon brushes require special attention.
Regular, meticulous cleaning of your sander is essential to ensure its durability and smooth operation on your worksites, even with high-quality tools like those from Repex Floor! Dust and debris can quickly damage your machine, even the best on the market. Make sure you find a secure place for it in your lorry to avoid bumps during transport, as a fall can cause serious damage. Make sure that no accessories or adhesives block the vital parts of the sander. Environmental conditions such as humidity, intense heat or extreme cold can also adversely affect your machine. Although seemingly robust, mistreating your sander considerably increases the risk of premature breakdown. So look after your equipment by cleaning it regularly and handling it with care to ensure optimum performance over the long term. Forget the words: repair sander!
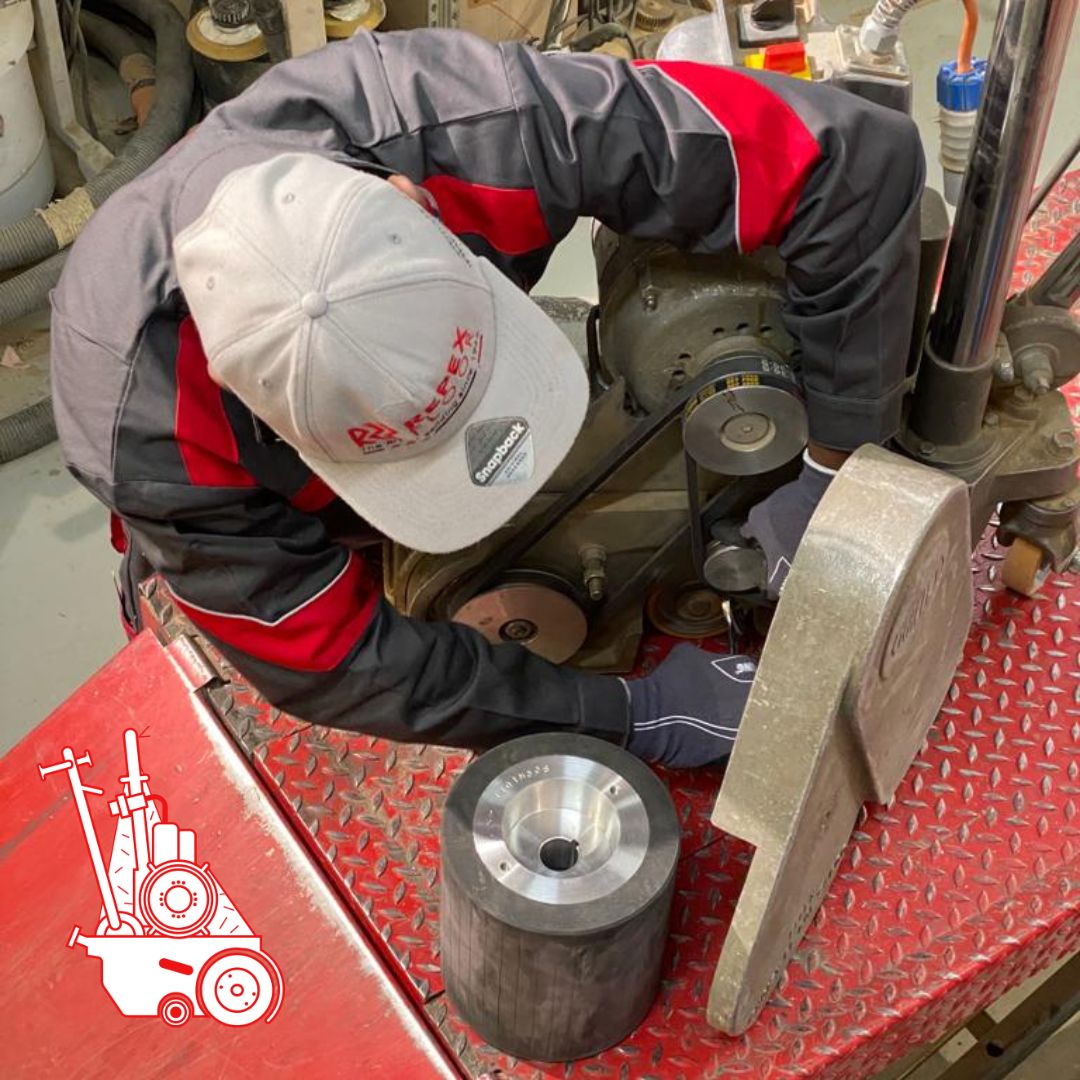
Sander repairs: the motor
There are several reasons why the motor of a sander may not start. You need to inspect the condition of the cables at the handle, as well as the entire electrical circuit and the connections to the motor.
Here are some potential causes to consider:
1. Power supply: First check that the machine is correctly connected and that the power supply is working. Make sure the power cord is in good condition and connected to a working socket.
2. Switch: The switch on the machine may be faulty. Try checking the switch to make sure it is working properly. Sometimes a faulty switch can prevent the motor from starting.
3. Thermal protection: Some motors are fitted with a thermal protection which cuts off the power supply if the motor overheats. Wait a moment for the motor to cool down, then try to restart the machine.
4. Fuse or circuit breaker: Check the circuit breaker in your electrical installation. A blown fuse or tripped circuit breaker can prevent the motor from operating.
5. Mechanical problems: Mechanical problems such as a broken belt, worn bearings or faulty gears can also prevent your sander motor from starting. Visually inspect the machine for any obvious signs of mechanical damage.
6. Problems with the motor: The motor itself may have internal problems such as a burnt winding, worn motor brushes or an electronic fault. These problems will often require a professional to diagnose and repair.
If none of these checks resolve the problem, it may be necessary to call in a qualified repairer to carry out a thorough diagnosis and repair the machine. Type: repair sander on your browser bar but ideally contact the manufacturer of your appliance directly.
If your sander emits a burning smell or sparks, there are a number of steps you can take to check and test the problem. First, clean the sander thoroughly to remove any build-up of dust or debris. Next, check the continuity of the power cord. Also test the switch to make sure it's working properly. Next, carefully inspect the sander's wiring and internal components for any signs of damage. Finally, inspect the motor and motor brushes to identify any wear or faults that could be causing the problem. These thorough checks will enable you to identify and resolve problems effectively without sander repairs.
If you find that the drum or discs on a sander are jammed, follow these steps to resolve the problem:
1. Stop the sander: Switch off the sander immediately to prevent further damage.
2. Unplug the power supply: Unplug the sander from the power supply for safety reasons.
3. Check the drum or disc holders: Visually inspect the drum or disc holders to identify the cause of the blockage. This could be a piece of jammed material, a build-up of dust or a mechanical problem.
4. Clean the jammed area: If a foreign object or debris is found, clean the area thoroughly to clear the drum or discs. Use a brush or suitable tool to remove obstructions.
5. Check fasteners: Make sure the drum or disc fasteners are properly tightened. Sometimes loosening can cause a blockage.
6. Check the bearings: Also check the bearings to make sure they are not worn or damaged, which could cause a jam.
7. Carefully try again: Once the area has been cleared and any problems resolved, carefully try operating the sander again to check that the problem has been solved.
If the blockage persists despite these measures, it may be necessary to call in a qualified professional to inspect the sander more thoroughly and carry out any necessary repairs.
A number of factors can cause abnormal noise before a sander is repaired:
1. Worn bearings : Worn or damaged internal bearings may generate unusual noises, such as grinding or rattling.
2. Belt problems: An incorrectly adjusted, loose or damaged belt can cause vibrations and unwanted noises.
3. Faulty gears: Faulty or poorly lubricated internal gears can produce creaking or grinding noises.
4. Engine problems: A faulty or poorly maintained engine may produce unusual noises, such as humming or rubbing noises.
5. Debris or foreign objects: Debris or foreign objects trapped inside the sander may cause abnormal noises during operation.
6. Loose fasteners: Loose screws or fasteners on the sander can cause excessive vibration and noise.
7. Wear and tear of internal parts: Normal wear and tear of the sander's internal components can also cause unusual noises over time.
To identify the specific cause of the abnormal noise, it is recommended that you visually inspect the sander, clean any clogged areas and check the mechanical components. If the problem persists, you know what you have to do!
Self-repairing your tools has never been so accessible. Whether you need to replace a faulty part or understand how your sander works, Repex Floor can help you every step of the way. Take charge of repairing your tools without having to learn how to do it yourself, and carry on working without interruption. Don't wait for a breakdown to slow you down. With Repex Floor, anticipate sander repairs!
Useful Resources
- Repex Floor: Easily find the right spare parts for your sander model from over 900 items.
- Assistance: Book a consultation with an expert for personalised advice.
Read our article on spare parts


![]()
The company Repex Floor offers the sale of sanding material specially designed and adapted for wooden floors. Parquet sanders, cleaning products…


